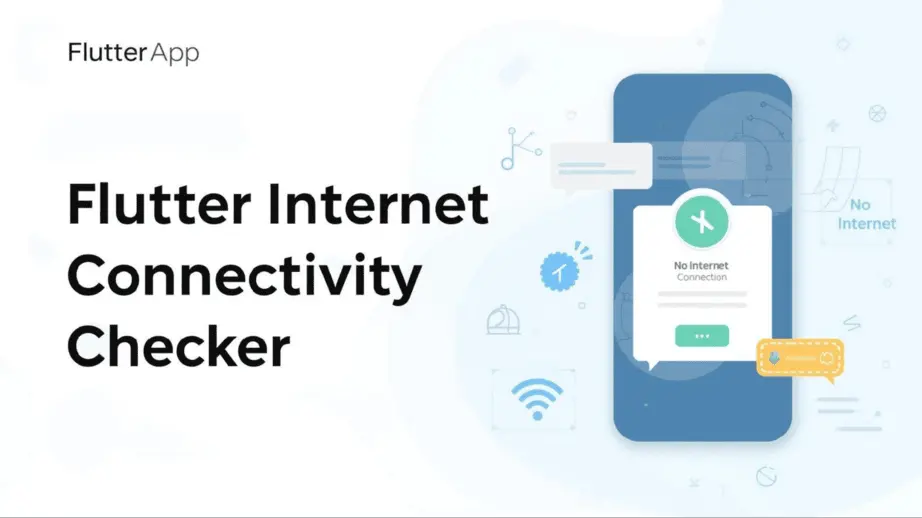
Build a Global Internet Connectivity Checker in Flutter 2025 – Step by Step
I have worked with many Flutter apps, and one thing I always notice is how bad user experience can get when the internet is unstable. Sometimes the app crashes, or the user sees a blank screen, and they don’t know what went wrong.
In this article, I will show you step by step how to build a global internet connectivity checker in Flutter. You will learn how to detect when the internet is lost, show a friendly offline dialog, and automatically recover when the connection comes back.

We will use simple code, clear examples, and organize everything so even if you are new to Flutter, you can follow along easily. By the end, your app will handle offline scenarios smoothly and make your users happy.
Table of Contents
- Introduction
- Why Internet Connectivity Matters in Mobile Apps
- Why Handling Internet Connectivity is Crucial
- What Happens When Apps Don’t Manage Offline Mode
- What You Will Learn in This Guide
- Quick Overview – What We Will Build
- Features of Our Connectivity Checker
- How It Improves User Experience
- Tools and Packages You Need
- Why Flutter Alone Isn’t Enough
- Required Packages
- Installing Packages
- Project Structure
- Recommended Folder Setup
- Why Separating Logic and UI Matters
- Step 1 – Creating the Connectivity Provider
- Purpose of Provider
- Key Implementation Points
- Sample Provider Code
- Quick Notes for Beginners
- Step 2 – Creating the Global Connectivity Manager
- Why Centralize Connectivity Logic
- Showing and Closing Dialog
- Sample Connectivity Manager Code
- Quick Notes for Beginners
- Step 3 – Building the Offline Dialog UI
- Dialog Features
- Sample Dialog Code
- Quick Notes for Beginners
- Step 4 – Utility Functions (ConnectivityUtils)
- Quick Connectivity Checks Anywhere
- Sample Utils Code
- Quick Notes for Beginners
- Step 5 – Integrating Everything in Main App
- Wrapping Root Widget
- Ensuring Continuous Monitoring
- Sample Main App Integration
- Tip for Beginners
- Step 6 – Testing Your Connectivity Checker
- Simulating Offline Mode
- Common Pitfalls for Beginners
- Tips for Effective Testing
- Summary and Best Practices
- Key Takeaways
- Tips for Keeping Apps Responsive and User-Friendly
Why Internet Connectivity Matters in Mobile Apps
Handling internet connectivity properly is crucial for mobile apps. Users expect apps to work smoothly, even when the network is slow or temporarily unavailable. If your app doesn’t handle offline scenarios, it can lead to a poor user experience, crashes, or lost data.
Why Handling Internet Connectivity is Crucial
- Users can lose progress if the app crashes when the internet drops.
- Apps may show blank screens or errors if offline state is not managed.
- Smooth offline handling keeps users happy and engaged.
- Integrating features like Flutter Push Notifications can also rely on proper connectivity management to deliver timely messages.
What Happens When Apps Don’t Manage Offline Mode
- The app may freeze or crash unexpectedly.
- Users get frustrated and may uninstall the app.
- Important actions, like sending data or receiving notifications, can fail silently.
What You Will Learn in This Guide
- How to detect internet connection changes globally in your app.
- How to show a non-dismissible offline dialog when connection is lost.
- How to automatically recover when the internet comes back.
- How to organize your code for beginners so it is clean and easy to maintain.
Quick Overview – What We Will Build
Features of Our Connectivity Checker
- Global internet monitoring across the app – it works in every screen automatically.
- Non-dismissible offline dialog popup – users are clearly informed when internet is lost.
- Automatic recovery when internet is restored – the dialog closes on its own when connection comes back.
- Optional manual “Check Connection” button – users can verify their connection anytime.
How It Improves User Experience
- Prevents crashes or blank screens – your app stays safe even if the network drops.
- Gives users clear feedback about connectivity – users know why some actions may not work.
Tools and Packages You Need
Why Flutter Alone Isn’t Enough
Flutter can detect if a device is connected to Wi-Fi or mobile data. But this is only the network connection.
It does not guarantee real internet access. For example, Wi-Fi may be on but the router has no internet.
That’s why we need extra tools to check real connectivity.
Required Packages
| Package | Purpose |
|---|---|
| connectivity_plus | Detects network changes (Wi-Fi, Mobile, or None) |
| http | Verifies real internet access by making a lightweight request |
| provider | Manages state across the app and updates UI automatically |
Check out Flutter File Downloads with Dio to learn how to handle file downloads, progress updates, and notifications in your Flutter apps.
Installing Packages
- Open
pubspec.yamland add the dependencies:dependencies: flutter: sdk: flutter connectivity_plus: ^4.0.1 http: ^1.1.0 provider: ^6.0.5 - Run the command in terminal:
flutter pub get
- Verify that the packages are installed by checking
pubspec.lock.
Project Structure
Recommended Folder Setup
Organizing your project properly helps you manage code easily and avoid confusion. Here’s a simple recommended setup:
my_flutter_app/
│
├── lib/
│   ├── providers/   → State management logic (ConnectivityProvider, etc.)
│   ├── widgets/     → Reusable UI components (dialogs, overlays)
│   ├── utils/       → Helper functions (ConnectivityUtils, etc.)
│   └── main.dart    → Entry point of the app
Explanation:
- providers/ – Keep all your ChangeNotifier or state classes here.
- widgets/ – Put all reusable UI components like the offline dialog.
- utils/ – Functions or classes that perform small utility tasks.
Why Separating Logic and UI Matters
- Easier to maintain: If something breaks, you know exactly where to look.
- Easier for beginners: Clear separation helps beginners understand which code controls data and which code controls UI.
- Scalable: As the app grows, the separation makes adding new features simpler.
Step 1 – Creating the Connectivity Provider
Purpose of Provider
The connectivity provider is the heart of our app’s internet monitoring. Its main jobs are:
- Detect changes in network connectivity (Wi-Fi, mobile data, or none).
- Verify if the device has real internet access (not just network connection).
- Notify the app about the current connection status so the UI can react.
Key Implementation Points
- Continuous monitoring with debounce: Prevents multiple rapid notifications when connection fluctuates.
- Safe usage of
notifyListeners(): Only update the UI when there is a real change. - Handling network lost/restored: Show offline Flutter dialogs when the internet is lost and close them automatically when restored.
Sample Provider Code
Here’s a dummy example to illustrate how a connectivity provider can be structured:
// connectivity_provider.dart
import 'package:flutter/foundation.dart';

/// ConnectivityProvider manages the internet connection state
/// across the entire app using ChangeNotifier.
class ConnectivityProvider extends ChangeNotifier {
  // Holds the current connection status. True = connected, False = offline
  bool _isConnected = true;

  // Getter to allow other widgets to access connection status
  bool get isConnected => _isConnected;

  /// Simulated method to update connection status.
  /// In a real app, you would check network + internet access.
  ///
  /// [status] - true if connected, false if offline
  void updateConnection(bool status) {
    // Only update state if it has changed to prevent unnecessary UI rebuilds
    if (_isConnected != status) {
      _isConnected = status;

      // notifyListeners() tells all listening widgets to rebuild
      // because the connection state has changed
      notifyListeners();
    }
  }
}
Quick Notes for Beginners:
- ChangeNotifier: Allows other widgets to listen for updates.
- _isConnected: Holds the current connectivity state.
- updateConnection(): Updates the state and notifies listeners if it changed.
Step 2 – Creating the Global Connectivity Manager
Why Centralize Connectivity Logic
It’s best to handle all connectivity logic in one place so that:
- You don’t have to repeat code on every screen.
- Offline dialogs are shown consistently across the app.
- State changes are easier to manage and debug.
Showing and Closing Dialog
- The dialog is triggered automatically when the network is lost.
- It closes automatically when the internet is restored.
- Non-dismissible behavior ensures the user notices the connectivity issue.
Sample Connectivity Manager Code
// connectivity_manager.dart
import 'package:flutter/material.dart';
import 'package:provider/provider.dart';

/// ConnectivityManager listens to the ConnectivityProvider
/// and shows or hides the offline dialog globally.
class ConnectivityManager extends StatelessWidget {
  final Widget child;

  /// The [child] widget is typically your MaterialApp or main screen.
  ConnectivityManager({required this.child});

  @override
  Widget build(BuildContext context) {
    // Consumer listens to the provider and rebuilds when state changes
    return Consumer(
      builder: (context, connectivity, child) {
        // Check if the device is offline
        if (!connectivity.isConnected) {
          // Show offline dialog if it is not already shown
          if (!connectivity.isDialogShown) {
            connectivity.showDialog(context);
          }
        } else {
          // Close offline dialog if the device is back online
          if (connectivity.isDialogShown) {
            connectivity.closeDialog();
          }
        }

        // Always return the child widget (your app content)
        return child!;
      },
      child: child,
    );
  }
}
Quick Notes for Beginners:
- Consumer: Listens to the provider and updates UI when connectivity changes.
- _isDialogShown: Ensures the dialog is not opened multiple times.
Step 3 – Building the Offline Dialog UI
Dialog Features
- Shows a friendly message like “No Internet Connection”.
- Optional “Check Connection” button for manual retry.
- Automatically closes when the internet returns.
Sample Dialog Code
// offline_dialog.dart
import 'package:flutter/material.dart';

/// OfflineDialog shows a friendly message when there is no internet.
/// It optionally allows the user to manually check their connection.
class OfflineDialog extends StatelessWidget {
  /// Flag to show a loading indicator when checking connection
  final bool isChecking;

  /// Callback triggered when user taps "Check Connection"
  final VoidCallback onCheckConnection;

  OfflineDialog({this.isChecking = false, required this.onCheckConnection});

  @override
  Widget build(BuildContext context) {
    return Dialog(
      backgroundColor: Colors.white,
      child: Padding(
        padding: const EdgeInsets.all(20),
        child: Column(
          mainAxisSize: MainAxisSize.min,
          children: [
            // Wi-Fi off icon to indicate offline status
            Icon(Icons.wifi_off, size: 48, color: Colors.red),
            SizedBox(height: 20),

            // Dialog title
            Text(
              "No Internet Connection",
              style: TextStyle(fontSize: 18, fontWeight: FontWeight.bold),
            ),
            SizedBox(height: 10),

            // Dialog subtitle / instructions
            Text(
              "Please check your connection. Dialog closes automatically.",
              textAlign: TextAlign.center,
            ),
            SizedBox(height: 20),

            // Optional manual "Check Connection" button
            ElevatedButton(
              onPressed: isChecking ? null : onCheckConnection,
              child: isChecking
                  ? CircularProgressIndicator() // Show loading if checking
                  : Text("Check Connection"),
            ),
          ],
        ),
      ),
    );
  }
}
Quick Notes for Beginners:
- The dialog is simple but visually clear.
- Loading indicator shows when the manual check is running.
- Combining Provider and this dialog ensures users always know the internet status.
Step 4 – Utility Functions (ConnectivityUtils)
Quick Connectivity Checks Anywhere
Sometimes, you just want to quickly know if the device is online without waiting for the provider. Our utility functions help you:
- Check if the device is connected to the internet.
- Check whether the connection is via Wi-Fi or mobile data.
- Get the current connectivity type as a string.
Sample Utils Code
// connectivity_utils.dart
import 'package:connectivity_plus/connectivity_plus.dart';
import 'package:flutter/material.dart';

/// ConnectivityUtils provides quick helper functions to check
/// internet and network status anywhere in the app.
class ConnectivityUtils {
  /// Instance of Connectivity from connectivity_plus package
  static final Connectivity _connectivity = Connectivity();

  /// Check if device is connected to any network
  static Future isConnected() async {
    final result = await _connectivity.checkConnectivity();
    return result != ConnectivityResult.none; // True if connected
  }

  /// Check if device is connected specifically to Wi-Fi
  static Future isConnectedToWiFi() async {
    final result = await _connectivity.checkConnectivity();
    return result == ConnectivityResult.wifi;
  }

  /// Check if device is connected specifically to Mobile Data
  static Future isConnectedToMobileData() async {
    final result = await _connectivity.checkConnectivity();
    return result == ConnectivityResult.mobile;
  }

  /// Get a human-readable string describing the current connectivity type
  static Future getConnectivityType() async {
    final result = await _connectivity.checkConnectivity();
    switch (result) {
      case ConnectivityResult.wifi:
        return 'WiFi';
      case ConnectivityResult.mobile:
        return 'Mobile';
      case ConnectivityResult.ethernet:
        return 'Ethernet';
      case ConnectivityResult.none:
        return 'None';
      default:
        return 'Unknown';
    }
  }
}
Quick Notes for Beginners:
- These functions can be called from anywhere in the app.
- They are lightweight and do not rely on UI context.
- Useful for one-off checks or conditional logic in buttons, screens, or services.
Step 5 – Integrating Everything in Main App
Wrapping Root Widget
To ensure connectivity monitoring works across the whole app:
- Wrap your
MaterialAppor home widget withConnectivityManager. - This makes sure that any connectivity change triggers the offline dialog globally.
Sample Main App Integration
// main.dart

import 'package:flutter/material.dart';
import 'package:provider/provider.dart';
import 'connectivity_provider.dart'; // Import your provider
import 'connectivity_manager.dart';  // Import your manager
import 'home_screen.dart';           // Import your home screen

void main() {
  runApp(
    MultiProvider(
      providers: [
        // Provide the ConnectivityProvider globally
        ChangeNotifierProvider(create: (_) => ConnectivityProvider()),
      ],
      child: MyApp(),
    ),
  );
}

/// Root widget of the app
class MyApp extends StatelessWidget {
  @override
  Widget build(BuildContext context) {
    return ConnectivityManager(
      // Wrap MaterialApp with ConnectivityManager to monitor connectivity globally
      child: MaterialApp(
        home: HomeScreen(), // Your main screen
      ),
    );
  }
}
Ensuring Continuous Monitoring
Thanks to ConnectivityProvider, your app will:
- Listen for network changes in real-time.
- Verify actual internet access before updating UI.
- Automatically open and close the offline dialog as needed.
Tip for Beginners: Always use the provider for state updates instead of checking connectivity directly in UI widgets. This keeps your code clean and reactive.
Step 6 – Testing Your Connectivity Checker
Simulating Offline Mode
Before you release your app, you must test how it behaves when there is no internet. You can simulate offline mode using:
- Device Settings: Turn off Wi-Fi and mobile data on a physical device.
- Emulator Settings: Use the emulator’s network controls to disable internet.
Once offline, open your app and check if the offline dialog appears and prevents further actions until internet is restored.
Common Pitfalls for Beginners
Here are a few issues you may encounter and how to fix them:
| Problem | Cause | Solution |
|---|---|---|
| Dialog not dismissing automatically | The provider isn’t verifying real internet access. | Check your _hasInternetAccess() logic and ensure the dialog closes when internet is detected. |
| Provider not updating UI | UI widgets are not wrapped with Consumer or context is wrong. | Wrap your widgets with Consumer<ConnectivityProvider> and call notifyListeners() correctly. |
| Multiple dialogs showing | Dialog state flag _isDialogShown not handled properly. | Use a boolean flag to track whether a dialog is currently shown and prevent duplicates. |
Tips for Effective Testing:
- Test on multiple devices and emulators for different network conditions.
- Simulate slow connections using network throttling to see if the app behaves well.
- Check how the app recovers automatically when internet comes back.
Summary and Best Practices
Key Takeaways
- Always monitor both network connection and real internet access, not just Wi-Fi or mobile data.
- Use a centralized provider or service to handle connectivity globally.
- Show clear, non-dismissible dialogs when the internet is lost to inform users.
- Provide optional manual “Check Connection” buttons for extra user control.
- Use utility functions for quick connectivity checks anywhere in the app.
Tips for Keeping Apps Responsive and User-Friendly
- Wrap your root widget with the connectivity manager so all screens are monitored.
- Debounce state changes to prevent rapid UI updates and unnecessary rebuilds.
- Test extensively on real devices and emulators with different network conditions.
- Keep the UI simple and informative—avoid overwhelming users with too many messages.
- Separate logic and UI for easier maintenance and cleaner code structure.
By following these practices, your app will handle offline scenarios gracefully and provide a smooth experience even when internet connectivity is unstable.