Bottom Sheet in Flutter Code Examples (Modal, Persistent)
Let’s make our app super beautiful and user-friendly with the bottom sheet in Flutter. I’ll discuss the 2 types of bottom sheets and their parameters with practical Flutter code examples for better understanding.
Let’s make our app super beautiful and user-friendly with the bottom sheet in Flutter. So, let’s understand its types and its practical implementation in the Flutter app. I’ll be using proper code examples with output images to explain better.
Bottom Sheet in Flutter – An Overview
Unlike Flutter showDialog, it’s a sheet that slides up with a beautiful animation from the bottom of the Flutter app’s screen and displays itself. It’s useful when you want to show additional data to the user while being on the same screen.
For instance, a user wants to add an image in Flutter and he/she clicks on an icon. Then we can show this bottom sheet with options like camera, gallery, etc.
Types of Flutter Bottom Sheet
It has two types and they are listed below. Let’s understand their syntax, working, and their parameters with proper code examples.
- Modal Bottom Sheet
- Persistent Bottom Sheet
1. Modal Bottom Sheet
 showModalBottomSheet(
     context: context, builder: (context) {
         // it also returns a widget
                    },)
- To display it, we’ve to call the showModalBottomSheet() method. It has 2 required parameters.
- context – It takes a BuildContext to specify where this sheet should appear.
- builder – It takes a function of a single parameter context(BuildContext). Inside it, we can specify what to display inside the sheet.
- When it’s displayed, it dims the background to get the user’s temporary focus.
- The user has to interact with it as they won’t be able to use other parts of the screen until this modal bottom sheet is closed.
- It can be closed by swiping this modal bottom sheet down, or if the user taps outside of this sheet(dimmed background). Also, you can close it with the custom tappable widget by using the Navigator.of(context).pop() method.
2. Persistent Bottom Sheet
showBottomSheet(
    context: context,
    builder: (context) {
      // return a flutter widget
}- We can show it using showBottomSheet(). It also has context and builder parameters that are required.
- This sheet when displayed stays open on the screen until the user closes it manually like from the pop() method, swipe it down, or if he/she moves to some other screen.
- The user can still tap on other parts of the app to do the desired tasks while this bottom sheet is open.
Examples to Practically Understand Flutter Bottom Sheet
We’ll first understand the implementation and parameters of the modal bottom sheet with code examples, then move to the persistent one. You can read the Flutter AlertDialog guide for more dialog options as well.
Example 1: Modal Bottom Sheet Examples
Example 1.1: ‘context’ and ‘builder’ parameter
ElevatedButton(
    onPressed: () {
        showModalBottomSheet(
             context: context,
             builder: (context) {
                return Column(
                     mainAxisSize: MainAxisSize.min,
                        children: [
                           ListTile(
                              leading: Icon(Icons.camera),
                              title: Text('Camera'),
                              ),
                           ListTile(
                              leading: Icon(Icons.image),
                              title: Text('Gallery'),
                              )
                            ]);
                      },
                    );
                  },
     child: Text('Show Modal Bottom Sheet'))
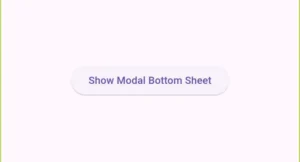
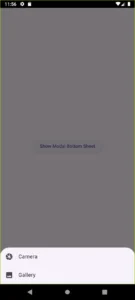
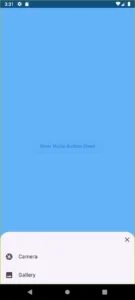
- Here, I created a simple Flutter elevated button, and in its onPressed function, I specified our modal sheet.
- I passed a column widget to the builder parameter and gave it some children which are ListTile widgets in our case. The mainAxisSize: MainAxisSize.min is used when you want the column to take up only the space required by its children.
- I used the Text widget to show text wherever important like ‘Camera’, ‘Gallery’, etc. Also, I used Flutter icons to make the design look good.
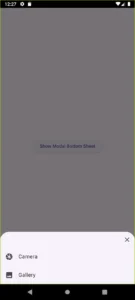
- After clicking on the button, the modal bottom sheet appears. We can click on the dimmed background area to close it or by swiping the sheet down. We can create a custom tappable area to close it which we’ll discuss in the below example.
Example 1.2: Button to Close Sheet
Align(
   alignment: Alignment.topRight,
   child: IconButton(
      onPressed: () {
        Navigator.of(context).pop();
                     },
         icon: Icon(Icons.close)),
     )
Example 1.3: ‘backgroundColor’ parameter
backgroundColor: Colors.blue
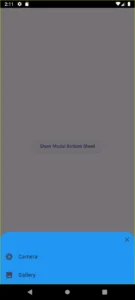
This parameter takes a color so I passed it a blue color. As a result, the background color of the modal bottom sheet is now blue. You can use other colors with shade, opacity, etc as well.
Example 1.4: ‘isDismissible’ parameter
isDismissible: false
Example 1.5: ‘barrierColor’ parameter
barrierColor: Colors.blue.withOpacity(0.7)
Example 2: Persistent Bottom Sheet Examples
Example 2.1: parameters(‘context’ and ‘builder’)
Center(
 child: Builder(
  builder: (BuildContext context) {
  return ElevatedButton(
  onPressed: () {
   showBottomSheet(
    context: context,
    builder: (BuildContext context) {
      return Container(
           color: Colors.white,
           padding: EdgeInsets.all(18.0),
           height: 200.0,
              child: Column(
                 crossAxisAlignment: CrossAxisAlignment.start,
                 children: [
                    Text('Hey there!,
                       style: TextStyle(
                         fontSize: 19,
                         fontWeight: FontWeight.w800,
                              ),
                            ),
                    SizedBox(height: 12),
                     Text(
                      'This bottom sheet will stay open until you manually close it.',
                      style: TextStyle(fontSize: 17.5),),
                    SizedBox(height: 25),
                    ElevatedButton(
                        onPressed: () {
                            Navigator.pop(context);
                              },
                              child: Text('Close'),
                            ),
                               ],
                               ),);},);},
            child: Text('Show Persistent Bottom Sheet'),
       ); }))
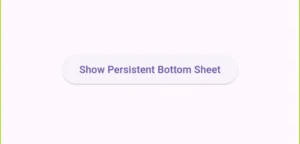
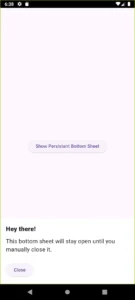
- I used this showBottomSheet() inside the elevated button’s onPressed function.
- I returned a Flutter container from the function passed to the builder parameter.
- Inside the container, I have shown some text and a button to manually close this persistent sheet as this button will trigger the pop method when clicked.
- You can see that there is no barrier to this sheet, so to close/dismiss it, we either have to swipe it down or tap the ‘Close‘ button.
- Important Point – You can see that I wrapped the button with the Builder widget. It’s very important in this case because the showBottomSheet needs the Flutter Scaffold’s context to properly display the bottom sheet in Flutter app’s screen. In our case, the context that I used might not be directly associated with the Scaffold. So by using the Builder(), we make sure that the persistent sheet is with the correct context.
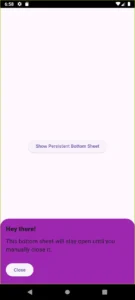
Example 2.2: parameter ‘backgroundColor’
backgroundColor: Colors.purple
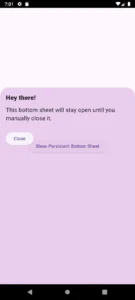
Example 2.3: ‘enableDrag’ parameter
enableDrag: false
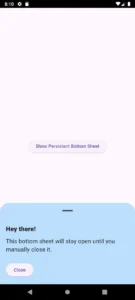
Example 2.4: ‘showDragHandle’ parameter
showDragHandle: true
Conclusion
I hope you now have a practical understanding of the bottom sheet in Flutter, its two types, and how to properly use it in your own Flutter app. I’ve tried to explain it with easy examples so it’s easy for you to learn.
If you still have issues or questions regarding the bottom sheet in Flutter, then do comment or email me. I’ll be more than happy to help you.
Thank you and do visit my other posts to get more useful information on Flutter widgets and more.

