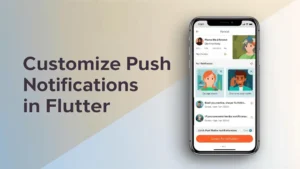
Customize Push Notifications in Flutter: Add Images, Buttons & More
In my last articles, I already showed how to set up push notifications and how to show Flutter in-app notifications. Those guides were only about learning the basic system. But this article is a little different. Here I will share how I make my notifications look better and work better inside real apps.
I will show you how I add big images, action buttons, custom sounds, and many small things that make a notification feel more modern. I learned these things by testing a lot in my own projects, and now I use them every day.
My goal is to help you take your simple notifications and turn them into something more useful and more attractive for your users. This is not about setup anymore. This is about improving and customizing what you already have.

Table of Contents
- 1. Introduction
- Why Customizing Notifications is Crucial for User Engagement
- Overview of What We’ll Learn in This Guide
- 2. Adding Custom Images to Push Notifications
- Why Images Enhance Notifications
- How to Add Images for Android and iOS
- Example Code for Including Images in Your Notifications
- 3. Incorporating Action Buttons in Notifications
- What Are Action Buttons and How They Improve User Interaction?
- Step-by-Step Guide to Adding Buttons (e.g., “View”, “Dismiss”)
- Handling Button Clicks and Navigating to Specific Screens
- 4. Customizing Notification Sound and Vibration Patterns
- Why Custom Sounds Matter for Notifications
- How to Set Up Custom Sound and Vibration for Android & iOS
- Example Code to Modify Sound and Vibration Settings
- 5. Designing Custom Notification Layouts for Android & iOS
- Overview of Notification Layout Customization
- Customizing Android Layouts with AndroidNotificationDetails
- Customizing iOS Layouts with UNNotificationRequest
- Example Code for Both Platforms
- 6. Scheduling Notifications and Triggering Custom Events
- How to Schedule Notifications in Flutter
- Creating Notifications Triggered by Specific Events
- Code Example for Scheduling Notifications
- 7. Rich vs. Simple Notifications: When to Use Each
- What Are Rich Notifications?
- Use Cases for Simple Text-Only Notifications
- Best Practices for Choosing Between Rich and Simple Notifications
- 8. Conclusion
- Recap of Customization Features Covered
- How Customization Improves User Experience and Retention
- Next Steps: Advanced Notification Features and Best Practices
- FAQs
Introduction
Why Customizing Notifications Is Important for User Engagement
When I first learned how to send push notifications in Flutter, everything felt very basic. The messages were small, plain, and sometimes easy to ignore. Later, when I worked on real apps, I noticed something important: users pay more attention when the notifications look nice and feel helpful.
If the notification has a picture, a clear button, or a special sound, people are more likely to open it. They feel like the app cares about them. This is why customization matters. It makes the app feel alive and more friendly to the user.
What You Will Learn in This Guide
In this guide, I will show you how I customize my own notifications in Flutter. I am not teaching the setup again, because we already did that in earlier articles. Here I will show you the extra parts that make a big difference, like:
- How to add images inside a notification
- How to place action buttons
- How to use custom sounds and vibration
- How to change the layout
- How to schedule notifications in a nicer way
All these things helped me make my apps look more professional, and I hope they will help you too.
Adding Custom Images to Push Notifications
Why Images Enhance Notifications
I noticed that when a notification has a picture, it immediately catches the user’s eye. A small text-only message can be ignored easily, but if there is a photo, logo, or any image, users are more likely to tap on it. Images make notifications look lively and give a better idea of what the message is about.
For example, if you are sending an update about a new event or a product, showing its picture can make users excited to check it out. However, to ensure users actually see these notifications with images, your app must handle internet connectivity properly (see: Flutter internet connectivity checker guide). Without reliable connectivity, rich notifications may fail to load images or appear late, reducing engagement.
How to Add Images for Android and iOS
To add images, we use the flutter_local_notifications plugin. Both Android and iOS support showing images in notifications, but the way we send them is a little different.
| Platform | How to Add Images |
|---|---|
| Android | Use BigPictureStyleInformation inside AndroidNotificationDetails to display a large image. |
| iOS | Attach an image using UNNotificationAttachment in DarwinNotificationDetails. |
You can use images from your app assets or directly from a URL. Using URLs is useful if you want to send dynamic images from your backend.
Example Code for Including Images in Your Notifications
Here is a simple example in Flutter:
// Android - showing big image
final BigPictureStyleInformation bigPictureStyle =
    BigPictureStyleInformation(
      DrawableResourceAndroidBitmap('your_image_name'), // or use NetworkImage
      contentTitle: 'New Event!',
      summaryText: 'Check out this cool event',
    );

final AndroidNotificationDetails androidDetails = AndroidNotificationDetails(
  'image_channel',
  'Image Notifications',
  channelDescription: 'Notifications with images',
  styleInformation: bigPictureStyle,
);

// iOS - adding image attachment
final DarwinNotificationDetails iosDetails = DarwinNotificationDetails(
  attachments: [
    DarwinNotificationAttachment('path_to_your_image.png')
  ],
);

final NotificationDetails platformDetails = NotificationDetails(
  android: androidDetails,
  iOS: iosDetails,
);

await flutterLocalNotificationsPlugin.show(
  0,
  'New Event',
  'Tap to see details',
  platformDetails,
);
With this code, your notifications will show an image along with the text. Users will notice them more, and it makes the app feel richer.
Incorporating Action Buttons in Notifications
What Are Action Buttons and How They Improve User Interaction?
Action buttons are small buttons that appear inside a notification. They let users do something directly without opening the app. For example, you can add a “View” button to open a specific screen, or a “Dismiss” button to close the notification.
Adding buttons makes notifications more useful. Users can act immediately, which increases engagement and saves time. Instead of just reading a message, they can interact with it in one click.
Step-by-Step Guide to Adding Buttons
We can use the flutter_local_notifications plugin to add action buttons. First, we define AndroidNotificationDetails or DarwinNotificationDetails with the buttons we want.
- Android: Use
AndroidNotificationActionto create buttons like “View” or “Dismiss”. - iOS: Use
DarwinNotificationActioninsideDarwinNotificationDetailsto add similar buttons.
Handling Button Clicks and Navigating to Specific Screens
After adding buttons, we need to handle clicks. When a user taps a button, we check which button was pressed and navigate to the right screen in the app. In Flutter, this is done using the onDidReceiveNotificationResponse callback for local notifications or by checking message.data for Flutter push notifications.
For example, if the user taps the “View” button, we can open the event details screen. If they tap “Dismiss”, we just remove the notification without opening anything. This gives a smooth and interactive experience.
Example Code
// Android action buttons
final AndroidNotificationDetails androidDetails = AndroidNotificationDetails(
  'action_channel',
  'Action Notifications',
  channelDescription: 'Notifications with buttons',
  actions: [
    AndroidNotificationAction('view', 'View'),
    AndroidNotificationAction('dismiss', 'Dismiss'),
  ],
);

// iOS action buttons
final DarwinNotificationDetails iosDetails = DarwinNotificationDetails(
  categoryIdentifier: 'customCategory',
  actions: [
    DarwinNotificationAction.text('VIEW', 'View'),
    DarwinNotificationAction.text('DISMISS', 'Dismiss'),
  ],
);

final NotificationDetails platformDetails = NotificationDetails(
  android: androidDetails,
  iOS: iosDetails,
);

// Show notification
await flutterLocalNotificationsPlugin.show(
  0,
  'New Event',
  'Check out the latest update',
  platformDetails,
  payload: 'eventId=12345', // use payload to navigate
);

// Handle clicks
flutterLocalNotificationsPlugin.initialize(
  InitializationSettings(
    android: AndroidInitializationSettings('@mipmap/ic_launcher'),
    iOS: DarwinInitializationSettings(),
  ),
  onDidReceiveNotificationResponse: (response) {
    if (response.actionId == 'view') {
      // Navigate to Event Details
      Get.to(() => EventDetailsScreen(eventId: '12345'));
    } else if (response.actionId == 'dismiss') {
      // Just close the notification
    }
  },
);
This setup makes your notifications interactive. Users can respond immediately, which improves engagement and makes your app feel smarter.
Customizing Notification Sound and Vibration Patterns
Why Custom Sounds Matter for Notifications
Custom sounds make your notifications stand out. If every app uses the same default sound, users might ignore your messages. A unique sound alerts the user that this notification is important and from your app. It can also improve user engagement because users recognize it instantly.
How to Set Up Custom Sound and Vibration for Android & iOS
You can set custom sounds and vibration patterns using flutter_local_notifications. On Android, you use AndroidNotificationDetails to set the sound and vibration pattern. On iOS, you use DarwinNotificationDetails with the sound name you added to your project.
- Android: Put your custom sound file in
android/app/src/main/res/raw/folder. Usesound: 'your_sound_file'inAndroidNotificationDetails. - iOS: Add your sound file to
Runnerin Xcode. Usesound: 'your_sound_file.aiff'inDarwinNotificationDetails.
Example Code to Modify Sound and Vibration
// Android custom sound and vibration
final AndroidNotificationDetails androidDetails = AndroidNotificationDetails(
  'sound_channel',
  'Sound Notifications',
  channelDescription: 'Notifications with custom sound and vibration',
  importance: Importance.high,
  priority: Priority.high,
  sound: RawResourceAndroidNotificationSound('custom_sound'), // custom_sound.mp3 in res/raw
  playSound: true,
  enableVibration: true,
  vibrationPattern: Int64List.fromList([0, 500, 1000, 500]), // wait, vibrate, pause, vibrate
);

// iOS custom sound
final DarwinNotificationDetails iosDetails = DarwinNotificationDetails(
  sound: 'custom_sound.aiff',
);

// Combine platform details
final NotificationDetails platformDetails = NotificationDetails(
  android: androidDetails,
  iOS: iosDetails,
);

// Show notification with custom sound and vibration
await flutterLocalNotificationsPlugin.show(
  0,
  'Special Alert',
  'This notification has a custom sound and vibration',
  platformDetails,
  payload: 'custom_sound_test',
);
With this setup, your notifications will play the custom sound and vibrate in the pattern you set. This grabs attention and makes users notice your app instantly.
Designing Custom Notification Layouts for Android & iOS
Overview of Notification Layout Customization
Custom notification layouts allow you to show more information or a unique style for your messages. Instead of plain text, you can show images, titles, subtitles, and buttons in a visually appealing way. This helps users understand your notification at a glance and makes your app feel professional.
Customizing Android Layouts with AndroidNotificationDetails
On Android, you can customize the layout using AndroidNotificationDetails. You can set a large icon, big picture style, or inbox style for multiple lines of text. This makes your notification look richer and more engaging.
- Big Picture Style: Shows a large image in the notification.
- Inbox Style: Shows multiple lines of text.
- Large Icon: Adds an image next to the title.
Customizing iOS Layouts with UNNotificationRequest
On iOS, you can customize notifications using DarwinNotificationDetails with attachments. You can add images, GIFs, or videos to the notification. The attachment must be added to the notification request so iOS can display it.
Example Code for Both Platforms
// Android: Big Picture Style
final BigPictureStyleInformation bigPictureStyle = BigPictureStyleInformation(
  DrawableResourceAndroidBitmap('big_image'), // place image in res/drawable
  contentTitle: 'Big Picture Notification',
  summaryText: 'This is a custom notification layout',
);

final AndroidNotificationDetails androidDetails = AndroidNotificationDetails(
  'custom_layout_channel',
  'Custom Layout Notifications',
  channelDescription: 'Notifications with images and styles',
  styleInformation: bigPictureStyle,
  importance: Importance.high,
  priority: Priority.high,
);

// iOS: Adding an image attachment
final DarwinNotificationDetails iosDetails = DarwinNotificationDetails(
  attachments: [
    DarwinNotificationAttachment('big_image.jpg'), // file added in Runner
  ],
);

// Combine platform details
final NotificationDetails platformDetails = NotificationDetails(
  android: androidDetails,
  iOS: iosDetails,
);

// Show notification
await flutterLocalNotificationsPlugin.show(
  0,
  'Custom Layout',
  'Notification with image and style',
  platformDetails,
  payload: 'custom_layout_test',
);
With these settings, your notifications will look richer and more attractive on both Android and iOS. You can mix images, text styles, and layouts to make each notification unique.
Scheduling Notifications and Triggering Custom Events
How to Schedule Notifications in Flutter
Scheduling notifications lets your app show messages at a specific time, even if the user is not actively using the app. This is useful for reminders, daily tips, or special offers. Flutter’s flutter_local_notifications plugin provides a simple way to schedule notifications for a future time.
Creating Notifications Triggered by Specific Events
You can also trigger notifications based on events like time, location, or user actions. For example:
- Time-based: Notify the user every day at 8 AM.
- Location-based: Notify the user when they enter a specific area.
- Event-based: Notify the user when a new message, update, or offer is available.
This helps users stay engaged and ensures they don’t miss important updates.
Code Example for Scheduling Notifications
// Import plugin
import 'package:flutter_local_notifications/flutter_local_notifications.dart';

// Initialize plugin
final FlutterLocalNotificationsPlugin flutterLocalNotificationsPlugin =
    FlutterLocalNotificationsPlugin();

// Schedule a notification 5 seconds from now
await flutterLocalNotificationsPlugin.zonedSchedule(
  0,
  'Scheduled Notification',
  'This notification shows after 5 seconds',
  tz.TZDateTime.now(tz.local).add(const Duration(seconds: 5)),
  const NotificationDetails(
    android: AndroidNotificationDetails(
      'scheduled_channel',
      'Scheduled Notifications',
      channelDescription: 'Notifications scheduled at specific times',
      importance: Importance.high,
      priority: Priority.high,
    ),
    iOS: DarwinNotificationDetails(),
  ),
  androidAllowWhileIdle: true,
  uiLocalNotificationDateInterpretation:
      UILocalNotificationDateInterpretation.absoluteTime,
);
You can change the duration or use conditions like location or user actions to trigger notifications. This makes your app smart and interactive.
Rich vs. Simple Notifications: When to Use Each
What Are Rich Notifications?
Rich notifications are notifications that include extra elements like images, buttons, and custom actions. They are more engaging because users can see pictures, interact with buttons, or quickly perform actions without opening the app. For example, a food delivery app can show the restaurant image and a “Track Order” button directly in the notification.
Use Cases for Simple Text-Only Notifications
Simple notifications only contain text. They are easy and lightweight, perfect for short messages or alerts. For example:
- Reminder: “Meeting starts in 10 minutes.”
- Alert: “Your password will expire soon.”
- Basic update: “Your order has been shipped.”
Simple notifications are quick to read and do not overwhelm the user.
Best Practices for Choosing Between Rich and Simple Notifications
- Use rich notifications when you want to grab attention and encourage interaction.
- Use simple notifications for quick alerts or short messages.
- Do not overload the notification with too many images or buttons, as it can confuse users.
- Test your notifications on both Android and iOS to ensure they display correctly.
By balancing rich and simple notifications, you can keep users engaged without annoying them.
Conclusion
Recap of Customization Features Covered
In this guide, we learned how to make push notifications in Flutter more attractive and useful. We covered adding custom images, action buttons, sounds, vibration patterns, and custom layouts. We also learned how to schedule notifications and trigger them based on specific events. Finally, we understood the difference between rich and simple notifications and when to use each.
How Customization Improves User Experience and Retention
Custom notifications make the app more engaging. Users are more likely to open notifications that look good and have useful buttons or images. Personalized sounds and vibration patterns also help grab attention. By using notifications smartly, you can improve user experience, keep users informed, and increase retention.
Next Steps: Advanced Notification Features and Best Practices
Once you are comfortable with basic customization, you can explore advanced features like:
- Dynamic notifications with content fetched from the server.
- Using categories or channels for different types of notifications.
- Integrating with app analytics to track which notifications get opened.
- Implementing location-based or event-based notifications for timely alerts.
Always test notifications on both Android and iOS devices. Keep them simple, clear, and engaging to provide the best experience to your users.
Frequently Asked Questions (FAQs)
Q1. What are push notifications in Flutter?
Push notifications are messages sent to a user’s device even when the app is not open. In Flutter, we use Firebase Cloud Messaging (FCM) and local notifications to send and display these messages.
Q2. Can I add images to notifications on both Android and iOS?
Yes, you can. Android supports big pictures in notifications using AndroidNotificationDetails, and iOS allows images through UNNotificationRequest with attachments.
Q3. How do action buttons work in notifications?
Action buttons let users interact with a notification without opening the app. For example, you can add “View” or “Dismiss” buttons, and handle their clicks to open a screen or perform a task.
Q4. Why should I customize notification sounds and vibrations?
Custom sounds and vibration patterns help grab users’ attention. They make notifications stand out and can match the app’s style, which improves user engagement.
Q5. Should I use rich notifications or simple text-only ones?
It depends on your goal. Rich notifications with images and buttons work well for promotions or updates. Simple text notifications are better for quick alerts or reminders. Choose based on the type of message and user needs.