How to Build In-App Notifications in Flutter (Step-by-Step Guide with Firebase)
Push notifications are very helpful. They tell users about new updates and important messages. But they have one problem. If the user closes the notification or wants to see it later, there is no place inside the app to find it again.
This is why in-app notifications are important.
In this article, I will share how I made an in-app notification system in a Flutter app. These notifications stay inside the app and do not disappear. Users can open the app anytime and see old notifications whenever they want. This works well with Flutter push notifications and makes the app more useful.
In this guide, I will explain how to:
Save notifications in Firebase
Get notifications in real time
Show them on a simple notification screen
Mark notifications as read or unread
Connect everything with an already working push notification system
I will keep everything simple and easy to understand. If push notifications are already working in your Flutter app, this is the right next step. It will make your notification system complete and more professional.
1. Introduction to In-App Notifications in Flutter
In-app notifications are messages that users see inside the app. They do not appear on the lock screen like push notifications. These notifications stay in the app until the user opens them or marks them as read.
Many apps use in-app notifications to show updates, alerts, or important messages. For example, you can combine this with Flutter File Downloads with Dio to show download progress and completion notifications directly inside your app, enhancing the user experience. This helps users check old notifications again whenever they want.
1.1 What Are In-App Notifications?
In-app notifications are simple messages stored inside the app.
Users can see them by opening a Notifications screen in the app.
For example:
A new update message
An offer or announcement
A reminder or alert
These notifications do not disappear. Even if the user closes the app, the messages are still there when they open it again.
In short, in-app notifications are like a message history inside your Flutter app.
1.2 How They Differ from Push Notifications
Push notifications and in-app notifications are not the same.
Both are useful, but they do different jobs.
| Push Notifications | In-App Notifications |
|---|---|
| Shown outside the app | Shown inside the app |
| Can be dismissed easily | Stay until user reads |
| Used to bring users back | Used to show history |
| Managed by the system | Fully controlled by the app |
Push notifications tell users something new happened.
In-app notifications help users find that information later.
That’s why many apps use both together.
1.3 Why Your Flutter App Needs an In-App Notification Center
Without an in-app notification center, users can miss important updates. Once they close a push notification, it is usually gone forever.
An in-app notification center solves this problem.
It helps your app by:
Keeping all notifications in one place
Letting users read messages anytime
Improving user experience
Making the app look more complete and professional
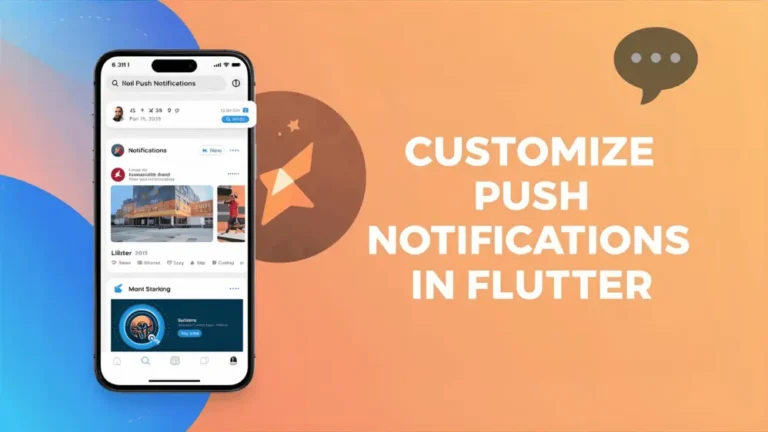
If your Flutter app already has push notifications, adding an in-app notification center is a smart next step. You can also customize Flutter push notifications to make them more engaging with images, buttons, and custom actions, giving users more control and making your app easier to use.
2. Prerequisites Before You Start
Before we start building the in-app notification system, there are a few things that should already be ready in your Flutter app. This will help you understand the steps easily and avoid confusion later.
2.1 What You Should Already Have from the Push Notifications Setup
This article is written as a next step after push notifications.
So, you should already have these things working in your app:
Firebase is connected to your Flutter project
Firebase Cloud Messaging (FCM) is set up
Push notifications are showing on the device
Notification permission is working on Android and iOS
You can receive notifications when the app is:
Open
In the background
Fully closed
If all this is already done, you are good to go.
If not, it’s better to complete the push notification setup first and then come back here.
2.2 Packages and Tools We’ll Use (Quick Overview)
We will not add many new tools. We will use simple and commonly used packages.
Here is a quick overview:
Firebase Firestore
We will use this to store notifications for each user.
This helps us show old notifications inside the app.Firebase Authentication
Used to know which user is logged in, so notifications are saved for the right person.State Management (GetX or similar)
This helps update the notification list automatically when new data comes.Flutter Widgets
Used to build the notifications screen and show the list.
If you already used these tools in your app, you will feel very comfortable while following this guide. We will keep everything simple and explain each step clearly.
3. Planning the In-App Notification Flow
Before we start writing code, it is good to understand how the whole notification system will work inside the app. This makes everything clear in your mind and helps you avoid messy code later.
In simple words, we will plan:
Where notifications come from
Where we will store them
How we will show them to the user
3.1 Where Notifications Come From (Push, Backend, In-App Events)
In a real app, notifications can come from different places. Here are the main ones:
Push Notifications (FCM)
These are sent from Firebase or your backend to the user’s device.
When the app receives a push notification, we can also save it in Firestore as an in-app notification.Backend or Admin Panel
Sometimes you might send notifications from:An admin dashboard
A cloud function
A server when some event happens (like a new post or order)
These notifications can also be saved directly into Firestore.
In-App Events
Some notifications don’t need push at all.
For example:“Your profile was approved”
“Your booking is confirmed”
“You unlocked a new badge”
These can be created inside the app and stored as in-app notifications only.
So, no matter where the notification comes from, our goal is simple:
“Every important notification should end up in Firestore, so the user can see it later inside the app.”
3.2 How We’ll Store Notifications in Firestore
We will store notifications in Firestore under each user’s document.
A simple structure can look like this:
Each notification will have some basic fields. Here is a simple table to understand them:
| Field Name | Type | Description |
|---|---|---|
| id | String | Unique ID of the notification |
| title | String | Short title of the notification |
| body | String | Main message text |
| read | Boolean | true if user has opened it, else false |
| createdAt | Timestamp | When the notification was created |
| data | Map / JSON object | Extra info (like itemId, type, etc.) |
This structure is flexible.
You can add more fields later if your app grows.
The idea is simple:
Every new notification → one new document in
users/{userId}/notifications.
3.3 High-Level Architecture (Service → Controller → UI)
To keep the app clean and easy to manage, we will follow a simple three-layer structure:
Service Layer (Notification Service)
Talks to Firebase Messaging and Firestore
Saves notifications into Firestore
Maybe also handles push tap events
Example:
NotificationService
Controller / State Layer (Notification Controller)
Listens to Firestore in real time
Keeps a list of notifications in memory
Updates the UI when data changes
Handles actions like:
markAsRead(id)markAllAsRead()
UI Layer (Screens and Widgets)
Shows the list of notifications to the user
Displays read and unread states
Sends user actions (like taps) back to the controller
You can think of the flow like this:
This way:
The service handles talking to Firebase
The controller handles app state
The UI only focuses on showing data and handling user taps
This simple structure makes your in-app notification system easy to build, easy to understand, and easy to extend in the future.
4. Step 1: Designing the Notification Data Model
Before we start coding, we need to decide how a notification will look in our database.
This step is very important, because our app will use this structure everywhere:
When saving a notification
When reading notifications
When showing them in the UI
So first, we will design a simple and clear data model.
4.1 Firestore Collection Structure (users → notifications)
We will store notifications in Firestore under each user.
A simple and common structure looks like this:
Here:
users→ main collection for all usersuserId→ document for one user (this comes from Firebase Auth)notifications→ sub-collection for that usernotificationId→ one document = one notification
So each user has their own list of notifications.
This is good because:
One user cannot see another user’s notifications
We can query only that user’s notifications easily
It is clean and easy to manage
4.2 Fields to Store for Each Notification
Now, let’s think about what we need to save for each notification.
We don’t want too many fields, but we need enough to show useful information.
Here are some basic fields:
id
The unique ID of the notification (we can use Firestore’s document ID).title
Short text, like: “New offer for you”.body
Main message, like: “You have a new message from John”.read
Atrueorfalsevalue to tell if the user already opened it.createdAt
Time when the notification was created (we can useserverTimestamp).data (optional but very useful)
Extra info in a Map/JSON format.
Example:type: “order” or “message”orderId: “12345”screen: “OrderDetails”
The data field will help us later to navigate to different screens when the user taps the notification.
4.3 Example Notification Document (Table View)
Here is a simple example of how one notification document might look in Firestore.
| Field Name | Example Value | Description |
|---|---|---|
| id | "notif_abc123" | ID of the notification |
| title | "New Event Near You" | Short title shown in the list |
| body | "A new event is happening tonight." | Main message text |
| read | false | User has not opened it yet |
| createdAt | 2025-12-09T10:30:00Z | When the notification was created |
| data | { "type": "event", "eventId": "1" } | Extra data for navigation or logic |
You can also imagine it like this in JSON form:
This simple model is enough for:
Showing a list of notifications
Marking them as read
Sorting them by time
Navigating to related screens
In the next step, we will connect this model with our notification service so that every new notification can be saved in Firestore using this structure.
5. Step 2: Updating the Notification Service to Save Notifications
Now we know how our notification data will look in Firestore.
Next, we need to make sure every new notification is saved there.
We will not build everything from zero.
We will use the same notification service that you already created for push notifications and just add some extra work to it.
The idea is simple:
“Whenever a push notification comes in, also save it as an in-app notification in Firestore.”
5.1 Connecting Push Notifications to In-App Storage
Right now, your NotificationService (or similar class) probably does things like:
Listen for messages from Firebase Cloud Messaging (FCM)
Show a local notification when the app is in the foreground
Handle taps on notifications
We are going to add one more step inside that flow:
App receives a push notification from FCM
Notification service reads the message
It shows a local notification (if needed)
It also saves the message to Firestore using the data model we made in Step 1
So after this change:
Push notifications = for catching user’s attention
In-app notifications = for keeping a history inside the app
Both will work together.
5.2 Saving Incoming Messages to Firestore
Now let’s talk about how to actually save a notification.
When a message comes from FCM, it usually has:
A
titleA
bodySome extra
data(optional)
Inside your notification service, you can create a simple method like:
You don’t have to use exactly this code, but the idea is:
Get the current user
Go to
users/{userId}/notificationsCreate a new document
Save all the fields we planned earlier
Later, when we build the UI, this is the data we will show on the notifications screen.
5.3 Handling Foreground vs Background Notifications
Push notifications behave a bit differently based on the app state.
So we must think about all three main cases:
App in the foreground (open and active)
App in the background (minimized)
App closed / terminated
Let’s see how saving to Firestore works in each case.
1) When the app is in the foreground
When the app is open, FirebaseMessaging.onMessage.listen is usually used.
Inside that listener, you can:
Show a local notification (using
flutter_local_notifications)Save the notification to Firestore
Example:
FirebaseMessaging.onMessage.listen((RemoteMessage message) async {
final notification = message.notification;
final data = message.data;

if (notification != null) {
// Show local notification (optional but nice for the user)
await _showLocalNotification(notification, data);

// Save to Firestore for in-app notification center
await saveNotificationToFirestore(
title: notification.title ?? '',
body: notification.body ?? '',
data: data,
);
}
});
So even if the app is open, users can later see the same message in the in-app notification center.
2) When the app is in the background
When the app is in the background and the user taps the push notification, FirebaseMessaging.onMessageOpenedApp runs.
Here also, you can make sure the notification is stored:
In many cases, you may already be saving it from the background handler or FCM payload logic, so be careful not to save the same notification twice. You can handle this later with IDs or checks if needed.
3) When the app is closed / killed
For this state, FirebaseMessaging.getInitialMessage() is used when the app starts.
You can call it in your main app startup and, if a message is found, also save it:
final initialMessage =
await FirebaseMessaging.instance.getInitialMessage();

if (initialMessage != null) {
final notification = initialMessage.notification;
final data = initialMessage.data;

if (notification != null) {
await saveNotificationToFirestore(
title: notification.title ?? '',
body: notification.body ?? '',
data: data,
);

// You can also navigate to a specific screen here
}
}
By the end of this step:
Every important push notification that reaches the app will also be saved in Firestore.
It does not matter if the app is open, in the background, or just opened from a notification.
Your in-app notification center will always have the same messages that users saw as push notifications.
In the next step, we will create a Notification Controller that listens to Firestore in real time and makes it easy to show these notifications in the UI.
6. Step 3: Creating the In-App Notification Controller (GetX or Any State Management)
Now our notifications are getting saved in Firestore.
Next, we need a simple way to read them and send them to the UI.
For this, we will use a controller.
You can use:
GetX
Provider
Riverpod
Or any other state management you like
In this guide, I will use the word controller in a simple way. The main idea is:
“The controller will listen to Firestore and give the latest notification list to the screen.”
6.1 Listening to Firestore in Real Time
We want the app to update automatically when:
A new notification is added
A notification is marked as read
Firestore has a nice feature called real-time snapshots.
With this, we don’t have to refresh manually. The data updates by itself.
In the controller, we do something like:
Get the current user ID
Go to
users/{userId}/notificationsOrder by
createdAt(most recent first)Listen to
.snapshots()
In simple words:
“Whenever something changes in the notifications collection, Firestore will tell the controller.”
6.2 Exposing an Observable Notification List
The controller should hold a list of notifications that the UI can watch.
For example, in GetX you might use:
A
List<AppNotification>Wrapped inside
.obsso it becomes reactive
The flow is like this:
Firestore sends new data to the controller
The controller converts each document into
AppNotificationobjectsThe controller updates its
notificationslistThe UI (screen) is listening and rebuilds when the list changes
So your UI will always show:
The latest notifications
In the correct order
Without any manual refresh button
6.3 Marking Single and All Notifications as Read
We also need some simple actions in the controller:
Mark one notification as read
When the user taps on a notification, we can:
Update the
readfield in Firestore totrueThe controller will get this change automatically
Mark all notifications as read
Maybe the user wants to clear all unread notifications at once.
In that case, the controller can:Query all notifications where
read == falseUse a batch update to set them all to
true
These two actions make the notification center feel more real and useful.
So in short, the controller is responsible for:
Listening to Firestore in real time
Keeping a list of notifications in memory
Giving that list to the UI
Providing simple actions like mark as read / mark all as read
7. Step 4: Building the Notifications Screen UI in Flutter
Now we have everything ready in the background:
Notifications are saved in Firestore
The controller is listening and holding a list
Next, we will build the screen where the user can see all their notifications in one place.
This will be a normal Flutter screen, something like NotificationsScreen.
7.1 Designing the Notification List Layout
The UI can be very simple at first.
We just need to show each notification in a list.
A common pattern is:
Use a
ScaffoldAdd an
AppBarwith title “Notifications”Use a
ListView.builderin the bodyEach
ListTileshows:Title
Body
Time (optional)
You can also add a button in the AppBar to “Mark all as read”, which will call the controller method we made in the previous step.
So the layout might look like this:
Top: AppBar
Right of AppBar: “Mark all read” button
Center: List of notifications
Keep it clean and easy to read. The goal is clarity, not fancy design.
7.2 Showing Read vs Unread States
A good notification center should clearly show which messages are new.
Here are some simple ideas:
Use bold text for unread notifications
Use normal text for read notifications
Show a small “NEW” icon or dot for unread items
Change background color slightly for unread notifications
For example:
read == falseTitle in bold
Maybe a small blue dot on the right
read == trueTitle in normal weight
No dot
This makes it very easy for the user to scan the list and see what they have not opened yet.
7.3 Handling Empty States (No Notifications Yet)
Sometimes the user will open the notifications screen and there will be nothing.
Maybe they are new to the app.
Maybe they cleared all messages.
Instead of showing a blank screen, we can show a friendly message.
For example:
“You don’t have any notifications yet.”
Or show a simple icon with some text below it
You can also add a short line like:
“New messages and updates will appear here.”
This tells the user that the screen is working, but there is just no data yet.
Handling empty states nicely makes your app feel more polished and user-friendly.
So after Step 4:
The controller is giving data in real time
The notifications screen is showing all notifications
Read and unread are visually different
Empty state is handled with a simple message
In the next steps, we can connect this screen with your existing buttons (like a “Notifications” button in the app) and also handle navigation when users tap a notification.
8. Step 5: Wiring the Notifications Screen into Your Existing App
Now we have the notifications screen ready.
But it is not useful until the user can actually open it from somewhere in the app.
So in this step, we will connect:
Your existing “Notifications” button
The new NotificationsScreen
We will also talk about showing an unread count and some simple UX tips.
8.1 Connecting the “Notifications” Button to the New Screen
In many apps, there is already a button or icon for notifications.
It might be on:
The home screen
The app bar
The bottom navigation bar
All we need to do now is:
When the user taps that button → open the Notifications screen.
For example, if you have a button that says “Notifications”, you can wrap it with a tap handler and navigate to your NotificationsScreen.
The important point is:
Do not change the UI design too much
Just connect the button to the new screen
Make sure the navigation is smooth and fast
This makes the feature feel like a natural part of the app, not something extra.
8.2 Optional: Showing Unread Count Badges
A small badge with a number can make notifications much more visible.
You have probably seen this in many apps, for example:
A bell icon with a red circle and number “3”
A bottom tab with a small dot when something is new
You can show:
Total unread notifications count, like
5Or just a small dot if you don’t want to show the number
The unread count can come from:
The controller (it already knows which notifications have
read == false)
You can then use that count to:
Show a badge on the notifications icon
Hide it when the count is
0
This is optional, but users really like it because they can see at a glance if there is something new.
8.3 Simple UX Tips to Make Notifications User-Friendly
Here are a few small tips that make a big difference:
Do not overload users
Don’t send a notification for every tiny thing.
Only send important and useful messages.Make titles clear
A title like “New update” is too vague.
Use things like:“Your order has been shipped”
“You have a new message”
Keep messages short
Long text is hard to read in a list.
Use short and simple lines.Let users control notifications (later, if you want)
You can add a settings page where users can turn off some types of notifications.
Good UX makes users trust your app more and feel comfortable with notifications.
9. Step 6: Handling Navigation When a Notification Is Tapped
Now the user can:
Open the notifications screen
See a list of notifications
But we also want something more:
When the user taps on a notification, they should go to the right screen in the app.
For example:
Tap on an order notification → go to order details
Tap on a message notification → open the chat screen
Tap on an event notification → open event details
We can do this by using the data that we stored with each notification.
9.1 Using Notification Data (type, IDs, etc.) for Deep Links
Remember the data field we added in the notification model?
It might look like this:
This small piece of data is very powerful.
It tells us:
What kind of notification it is (
type)Which item to open (
orderId,eventId, etc.)
We can use this data to perform deep links inside the app.
Deep linking here simply means:
“Open a specific screen and pass some ID to it.”
9.2 Navigating to Details Screens from In-App Notifications
When the user taps on a notification in the list:
The app calls something like
onTapWe mark the notification as read (optional but recommended)
We look at the notification’s
dataBased on the
type, we decide where to go
For example:
If
type == "order"→ navigate toOrderDetailsScreen(orderId)If
type == "event"→ navigate toEventDetailsScreen(eventId)If
type == "message"→ navigate to a chat screen
This way, one simple list can take the user to many different parts of the app.
It feels very natural:
See the notification → tap it → arrive at the right page.
9.3 Keeping Navigation Logic Clean and Scalable
If you have only one or two types, you might be tempted to write many if or switch statements in the UI directly.
But as the app grows, that can become messy.
Here are some simple ideas to keep it clean:
Put the “decide where to go” logic in:
A helper method
Or inside the controller/service
Make a small function like:
handleNotificationTap(data)
Inside that function, you:
Read the
typeNavigate to the correct screen
Then in your UI, the tap handler is simple:
onTap: () => handleNotificationTap(notification.data)
This makes your code:
Easier to read
Easier to change later
Easier to add new notification types
For example, in the future you might add:
“Friend request” notifications
“New follower” notifications
“System alert” notifications
You only need to update the central navigation logic, not every screen.
After Step 6:
The notifications screen is connected to your app
Users can see when they have new messages (with badges if you want)
Tapping a notification takes them directly to the right place
In the next part of the article, you can focus on testing the whole flow and making sure everything works in all app states: foreground, background, and after opening from a push notification.
10. Step 7: Testing the In-App Notification Center
Now that everything is connected, it is very important to test the full notification flow. Testing helps you find small mistakes before real users do.
You should test notifications in different situations, not just one.
10.1 Test Scenarios (Foreground, Background, Dismissed Push)
Here are the main cases you should test:
1. App in the foreground
Open the app
Send a push notification
Check that:
A local notification is shown (if you added it)
The notification is saved in Firestore
The notification appears in the in-app notification list
2. App in the background
Minimize the app
Send a push notification
Tap the notification from the system tray
Check that:
The app opens correctly
The notification is saved in Firestore
It appears in the notification screen
3. Push notification dismissed
Send a push notification
Do not tap it, just dismiss it
Open the app manually
Go to the notifications screen
Check that:
The notification is still there
This test is very important.
It proves that your in-app notification system is working correctly, even if the push notification is ignored.
10.2 Common Issues and How to Debug Them
While testing, you may face some small problems. This is normal.
Here are some common issues and simple checks:
Notifications not appearing in the app
Check if they are actually saved in Firestore
Open Firebase Console and look inside:
users → userId → notifications
Duplicate notifications
This can happen if you save the same notification in:
Foreground listener
Background handler
You can fix this later by:
Checking IDs
Or adding simple checks before saving
Notifications show, but navigation does not work
Print the
datafield and see if it has:typeRequired IDs
Make sure the keys match what your app expects
Read/unread status not updating
Check if the
readfield is updating in FirestoreMake sure your controller is listening with
.snapshots()
Debug slowly and test one case at a time. This makes it easier to find the real problem.
10.3 Checklist Before Shipping to Production
Before releasing your app, go through this simple checklist:
✅ Notifications are saved in Firestore
✅ Notification list updates in real time
✅ Read and unread states work correctly
✅ “Mark all as read” works
✅ Notification screen opens from the main app
✅ Tapping a notification goes to the correct screen
✅ Empty state shows a friendly message
✅ Works on both Android and iOS
If all these points are working, your in-app notification center is ready for real users.
11. Bonus Ideas to Improve Your Notification System
Once the basic system is working, you can slowly improve it. These features are optional but very useful.
11.1 Grouping Notifications by Type or Date
If your app has many notifications, a long list can feel messy.
You can improve this by:
Grouping notifications by date:
Today
Yesterday
Older
Or grouping by type:
Orders
Messages
Offers
Updates
This makes it easier for users to find what they are looking for.
11.2 Adding Filters and Tabs (All / Unread / Offers / Updates)
You can also add simple tabs or filters at the top of the notifications screen.
For example:
All – shows everything
Unread – shows only new notifications
Offers – shows promotional messages
Updates – shows system updates
This gives users more control and improves the overall experience.
11.3 Analytics & Tracking Which Notifications Users Open
To understand user behavior, you can track:
Which notifications are opened
Which are ignored
Which types users open the most
This can be done by:
Updating Firestore when a notification is opened
Or using analytics tools like Firebase Analytics
With this data, you can:
Improve notification content
Reduce unwanted notifications
Send better and more useful messages
With proper testing and a few improvements, your in-app notification system will feel solid and reliable. It will work smoothly with push notifications and give users a much better experience inside your Flutter app.
Conclusion & Next Steps
We’ve come a long way in this guide, and now you have a complete in-app notification system in your Flutter app. Let’s quickly recap what we built and see what you can do next.
12.1 Quick Recap of What We Built
In this article, we created a simple and useful in-app notification center. Step by step, we:
Planned how notifications should work inside the app
Designed a clean notification data model in Firestore
Saved incoming notifications for each user
Created a controller to listen to notifications in real time
Built a notifications screen to show all messages
Added read and unread states
Connected the screen with existing buttons
Handled navigation when a notification is tapped
Tested the system in different app states
By the end, users can open the app anytime and see their past notifications in one place.
12.2 How This Connects with Your Push Notification Setup
Push notifications and in-app notifications work best together.
Here’s how they connect:
Push notifications bring users into the app
In-app notifications keep a history of those messages
Even if a user ignores or dismisses a push notification, it is still saved inside the app
So now, your app:
Does not lose important messages
Feels more reliable
Gives users better control over notifications
If you already followed a push notification guide earlier, this article completes that setup.
12.3 Where to Go Next (Local, Scheduled, Topics, etc.)
Once you are comfortable with in-app notifications, you can explore more features, such as:
Local notifications
Show reminders directly from the app without using the internet.Scheduled notifications
Send notifications at a specific time, like reminders or alerts.Topic-based notifications
Send messages to groups of users, such as:City-based updates
Category-based alerts
Notification settings screen
Let users choose what type of notifications they want to receive.
These features will make your app even more powerful and user-friendly.
FAQs
Q1. What is the difference between push notifications and in-app notifications?
Push notifications appear outside the app and are used to alert users quickly. In-app notifications appear inside the app and are stored so users can read them later.
Q2. Do in-app notifications work without push notifications?
Yes. In-app notifications can be created from inside the app or backend events. Push notifications are helpful but not required.
Q3. Can users delete in-app notifications?
Yes. You can easily add a delete option or auto-delete old notifications using Firestore rules or background jobs.
Q4. Is Firestore good for storing notifications?
Yes. Firestore works very well for real-time notifications and small data like messages, alerts, and updates. When combined with Flutter animations, you can also make your in-app notification screen more engaging by adding smooth animations when new notifications appear, unread items are highlighted, or a notification is marked as read. If you want to learn more about creating simple and clean animations, you can check out this helpful guide on Flutter animations.
Q5. Can I use another state management instead of GetX?
Yes. You can use Provider, Riverpod, Bloc, or any other state management. The logic stays the same.