How to use ListView.builder in Flutter (Code Examples) 2025
In Flutter, ListView.builder is a powerful constructor that helps in efficiently rendering large or infinite lists of items. Unlike ListView, which creates all items at once, ListView.builder only builds widgets that are visible on the screen, improving performance by reducing memory and CPU usage.
This article covers:
- What
ListView.builderis and why it is useful - Syntax and parameters explained in detail
- Examples demonstrating various use cases
If you have interest in grid views too then we’ve a detailed article on Flutter GridView Widget in which its 4 methods are explained with practical code examples.
What is Flutter ListView.builder?
ListView.builder is a constructor in Flutter’s ListView class that dynamically generates list items as needed. This is particularly useful when dealing with large datasets fetched from APIs or local storage since it ensures efficient rendering without excessive memory consumption.
Key Features
- Creates items only when they are about to be visible on the screen.
- Efficient for handling long or infinite lists.
- Supports dynamic and customizable UI components.
- Works well with scrolling and performance optimization techniques.
Syntax of ListView.builder
Below is the syntax for ListView.builder:
ListView.builder(
  itemCount: itemCount,
  itemBuilder: (BuildContext context, int index) {
    return Widget;
  },
)
Parameters Explained
| Parameter | Type | Description |
|---|---|---|
itemCount | int? | Specifies the number of items in the list. If null, the list will be infinite. |
itemBuilder | IndexedWidgetBuilder | A function that returns the widget corresponding to each item in the list. It takes context and index as parameters. |
padding | EdgeInsetsGeometry? | Defines padding around the list. |
reverse | bool | Reverses the scrolling direction (default is false). |
controller | ScrollController? | Controls scrolling behavior. Useful for custom scroll positioning. |
physics | ScrollPhysics? | Defines the scrolling behavior (e.g., bouncing, never scrollable). |
shrinkWrap | bool | Determines whether the list should shrink its size to fit its children. Default is false. |
Example 1: Basic Implementation of List View Builder
Below is a simple example demonstrating the use of ListView.builder:
import 'package:flutter/material.dart';

void main() => runApp(const MyApp());

class MyApp extends StatelessWidget {
  const MyApp({Key? key}) : super(key: key);

  @override
  Widget build(BuildContext context) {
    return MaterialApp(
      title: 'ListView.builder Example',
      theme: ThemeData(primarySwatch: Colors.blue),
      home: const MyHomePage(),
    );
  }
}

class MyHomePage extends StatelessWidget {
  const MyHomePage({Key? key}) : super(key: key);

  @override
  Widget build(BuildContext context) {
    final List<String> items = ['Apple', 'Banana', 'Cherry', 'Date', 'Fig', 'Grapes'];

    return Scaffold(
      appBar: AppBar(title: const Text('ListView.builder Example')),
      body: ListView.builder(
        itemCount: items.length,
        itemBuilder: (context, index) {
          return ListTile(
            title: Text(items[index]),
            leading: const Icon(Icons.shopping_cart),
          );
        },
      ),
    );
  }
}
Explanation:
- The
itemCountparameter defines the number of list items. - The
itemBuilderfunction creates aListTilefor each item. - Each
ListTiledisplays Flutter text and an icon.
Example 1.1: itemCount parameter
This parameter defines the number of items to be displayed. If null, the list is infinite.
itemCount: 5
This parameter takes an integer value. The list will display exactly 5 items (Item 0 to Item 4).
Example 1.2: itemBuilder Parameter
The itemBuilder function automatically creates each list item when needed. It means you don’t need to create items more than once if you want multiple of them.
ListView.builder( itemCount: 10, // The list will have 10 items
    itemBuilder: (context, index){
         return ListTile(
            title: Text('Item $index'), // Main text
            subtitle: Text('This is item number $index'), // Smaller text below ); }, )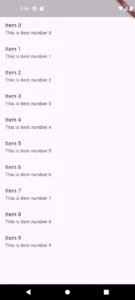
Explanation:
- The list generates 10 items because of itemCount: 10.
- itemBuilder repeats for every item in the list.
- Each item has:
- A title (e.g., “Item 0”, “Item 1″…)
- A subtitle (extra text below the title).
Example 1.3. padding parameter
The padding property adds space around the entire list, preventing the items from touching the screen edges.
padding: EdgeInsets.all(55.0)

Explanation:
- EdgeInsets.all(55.0) → Adds 55 pixels of space on all sides (top, bottom, left, and right).
- Without padding, the list items would be too close to the screen edges.
- You can also set different padding values:
- EdgeInsets.symmetric(vertical: 10, horizontal: 20) → 10px top & bottom, 20px left & right
- EdgeInsets.only(top: 20, left: 10) → Padding only on top and left
This helps in making the screen or blocks look cleaner and more readable.
Example 1.4. reverse Parameter
reverse: true
The
reverseproperty changes the scroll direction of the list. When set totrue, the list starts from the last item and moves upward instead of the usual top-to-bottom order.Default Value:
- By default,
reverseis false, meaning the list scrolls from top to bottom (first item appears first).
- By default,
When
reverse: true:- The list starts with the last item and scrolls from bottom to top.
- Commonly used in chat apps where newer messages appear at the bottom, and older ones scroll up.
In short, reverse just flips the order of how items appear and scroll in a list.
Example 1.5. controller parameter
controller: // pass a scroll controller to it
- The
controllerparameter lets you control the scrolling behavior programmatically. - If value is not provided, Flutter automatically manages scrolling.
- We can use it to:
- scroll to a specific position using
_scrollController.jumpTo(offset). - Smooth scrolling with
_scrollController.animateTo(offset, duration, curve). - Detecting scroll position for features like “Scroll to Top” buttons.
- scroll to a specific position using
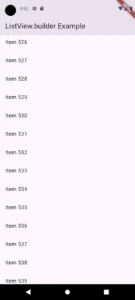
Example 1.5.1: Example of controller Scrolling to a Specific Position
final ScrollController _scrollController = ScrollController();

void _scrollToPosition() {
  _scrollController.jumpTo(200.0); // Moves to the 200-pixel position
}

ListView.builder(
  controller: _scrollController, // Attach the ScrollController
  itemCount: 50,
  itemBuilder: (context, index) {
    return ListTile(title: Text('Item $index'));
  },
);
Example 1.5.2: Example of controller Smooth Scrolling to the Bottom
void _scrollToBottom() {
  _scrollController.animateTo(
  _scrollController.position.maxScrollExtent, // Scrolls to the bottom
  duration: const Duration(seconds: 1),
  curve: Curves.easeInOut,
);
}
Example 1.5.3: Example of controller Smooth Scrolling to the Bottom
_scrollController.addListener(() {
   if (_scrollController.offset > 300) {
   print("User scrolled past 300 pixels!");
   }
});
Example 1.5.4: Example of controller Detecting Scroll Position for “Scroll to Top” Button
@override
void initState() {
super.initState();
  _scrollController.addListener(() {
  if (_scrollController.offset > 300) {
  print("User scrolled past 300 pixels!");
  }
});
}- Listens to scroll changes and prints a message when scrolled beyond 300 pixels.
- Useful for showing a “Scroll to Top” button when the user scrolls down.
These examples demonstrate how to manage scrolling programmatically using the controller parameter in Flutter ListView.builder.
Example 1.6: physics parameter
physics
This parameter controls how the list behaves when scrolling. It defines how the list responds to user gestures and interacts with the edges of the scrollable area.
Default Behavior
- If
physicsis not specified, Flutter automatically applies platform-specific scrolling:- Android: Uses
ClampingScrollPhysics()(stops at the edge). - iOS: Uses
BouncingScrollPhysics()(bounces at the edge).
- Android: Uses
Commonly Used physics Options
BouncingScrollPhysics()
- Adds a bouncy effect when reaching the top or bottom.
- Commonly used for iOS-style scrolling.
ClampingScrollPhysics() (Default for Android)
- Stops immediately at the edge without bouncing.
- Standard Android scrolling behavior.
NeverScrollableScrollPhysics()
- Disables scrolling completely.
- Useful when the list is inside another scrollable widget to prevent nested scrolling issues.
AlwaysScrollableScrollPhysics()
- Forces the list to be scrollable even if there are few items.
- Useful when you want empty space to be scrollable, like for pull-to-refresh.
When to Use Which Physics?
- Use BouncingScrollPhysics() → For an iOS-style bounce effect.
- Use ClampingScrollPhysics() → For default Android behavior.
- Use NeverScrollableScrollPhysics() → When the list is inside another scrollable widget.
- Use AlwaysScrollableScrollPhysics() → To enable scrolling even with few items.
Example 1.7: shrinkWrap parameter
shrinkWrap: true
This parameter controls how much space the ListView takes inside its parent widget.
Default Behavior
- If
shrinkWrapis not specified (or set tofalse), theListViewtakes up all available space in its parent widget, even if it has fewer items. - This works well when the list is the main scrollable content of the screen.
When shrinkWrap: true is Used
- The
ListViewonly takes up as much space as needed based on its items. - This is useful when placing a list inside another scrollable widget (like a
ColumnorSingleChildScrollView).
Common Use Cases for shrinkWrap: true
Inside a Column or SingleChildScrollView
- When using a
ListViewinside aColumn, settingshrinkWrap: trueensures the list doesn’t take infinite space.
- When using a
Displaying a Small List
- If the list has only a few items, enabling
shrinkWrapprevents it from unnecessarily taking up the full screen height.
- If the list has only a few items, enabling
Nested Scrolling Issues
- Helps prevent conflicts when a
ListViewis placed inside another scrollable widget.
- Helps prevent conflicts when a
When to Use shrinkWrap: true?
- When the list is not the main scrolling content of the page.
- When inside a Column or another scrollable widget.
- When you want the list to only take the necessary space instead of expanding.
Example 2: Large List with Cards
In this example, we generate a long list dynamically.
  final myProducts = List<String>.generate(1000, (i) => 'Product $i');

  ListView.builder(
        itemCount: myProducts.length,
        itemBuilder: (context, index) {
          return Card(
            key: ValueKey(myProducts[index]),
            margin: const EdgeInsets.symmetric(vertical: 5, horizontal: 15),
            child: Padding(
              padding: const EdgeInsets.all(10),
              child: Text(myProducts[index]),
            ),
          );
        },
      )
Explanation:
- A list of 1000 items is generated using
List.generate(). ListView.buildercreates a Flutter card widget for each item dynamically.- The
ValueKeyensures better performance when updating the list dynamically.
3. ListView.separated Example (Spacing Between Items)
It is a great option when you need fixed spacing or dividers between items.
ListView.separated(
          itemCount: items.length,
          itemBuilder: (context, index) {
            return ListTile(
              title: Text(items[index]),
              leading: const Icon(Icons.star),
            );
          },
          separatorBuilder: (context, index) =>
              const Divider(), // Adds a divider between items
        )
Explanation
- The
separatorBuilderparameter inserts aDividerwidget between each item. - This method is efficient and avoids wrapping items in unnecessary widgets.
4. AutomaticKeepAliveClientMixin (Preserve Item States)
When using ListView.builder with stateful widgets, items might lose their state when scrolled off-screen. Use AutomaticKeepAliveClientMixin to preserve their state. This technique is useful in apps like the Flutter ML Kit app, where dynamic lists display detected text, labels, or faces and maintaining state is important for a smooth user experience.
class MyHomePage extends StatefulWidget {

  const MyHomePage({Key? key}) : super(key: key);

  @override

  State<MyHomePage> createState() => _MyHomePageState();

}

class _MyHomePageState extends State<MyHomePage> {

  // List of items with their selected state

  final List<Map<String, dynamic>> items = List.generate(

    10,

    (index) => {"title": "Item $index", "isChecked": false},

  );

  @override

  Widget build(BuildContext context) {

    return Scaffold(

      appBar: AppBar(title: const Text('ListView.builder Example')),

      body: ListView.builder(

        itemCount: items.length,

        itemBuilder: (context, index) {

          return StatefulItem(

            title: items[index]["title"],

            isChecked: items[index]["isChecked"],

            onChanged: (value) {

              setState(() {

                items[index]["isChecked"] = value;

              });

            },

          );

        },

      ),

    );

  }

}

class StatefulItem extends StatefulWidget {

  final String title;

  final bool isChecked;

  final ValueChanged<bool?> onChanged;

  const StatefulItem({

    Key? key,

    required this.title,

    required this.isChecked,

    required this.onChanged,

  }) : super(key: key);

  @override

  State<StatefulItem> createState() => _StatefulItemState();

}

class _StatefulItemState extends State<StatefulItem>

    with AutomaticKeepAliveClientMixin {

  @override

  Widget build(BuildContext context) {

    super.build(context); // Required to notify the mixin

    return CheckboxListTile(

      title: Text(widget.title),

      value: widget.isChecked,

      onChanged: widget.onChanged,

    );

  }

  @override

  bool get wantKeepAlive => true; // Keeps state alive

}
Explanation
- The
AutomaticKeepAliveClientMixinensures that theCheckboxListTilemaintains its checked state even after scrolling.
5. cacheExtent (Preloading Items for Better Performance)
The cacheExtent parameter defines how far ahead (in pixels) items should be preloaded.
ListView.builder(
itemCount: 1000,
cacheExtent: 1000, // Preloads items within 1000 pixels
itemBuilder: (context, index) => ListTile(title: Text('Item $index')),
)
Explanation
- This improves the user experience by preloading items before they appear on the screen, making scrolling smoother.
6. NeverScrollableScrollPhysics (Disable Scrolling for Nested Lists)
If you have a ListView inside another scrollable widget (like SingleChildScrollView), you might want to disable the inner list’s scroll behavior.
SingleChildScrollView(
child: ListView.builder(
physics: const NeverScrollableScrollPhysics(), // Disables scrolling
shrinkWrap: true, // Makes the list adapt to its content size
itemCount: 10,
itemBuilder: (context, index) => ListTile(title: Text('Item $index')),
),
)
Explanation
NeverScrollableScrollPhysicsdisables the internal list’s scrolling to prevent conflicts with the parent scrollable widget.
Best Practices for Using ListView.builder
- Use itemCount efficiently: Avoid unnecessary large values when the list length is known.
- Optimize itemBuilder function: Keep widget creation lightweight to improve performance.
- Use keys for stateful widgets: Assign unique keys to list items for better list performance.
- Use scroll physics wisely: If the list is inside another scrollable widget, consider
physics: NeverScrollableScrollPhysics(). - Preserve item states: When using stateful widgets inside
ListView.builder, wrap them withAutomaticKeepAliveClientMixin.
Conclusion
Flutter’s ListView.builder is an essential tool for creating scrollable lists efficiently. It significantly improves performance by rendering only visible items. By understanding its syntax, parameters, and use cases, you can effectively implement dynamic lists in your Flutter applications.