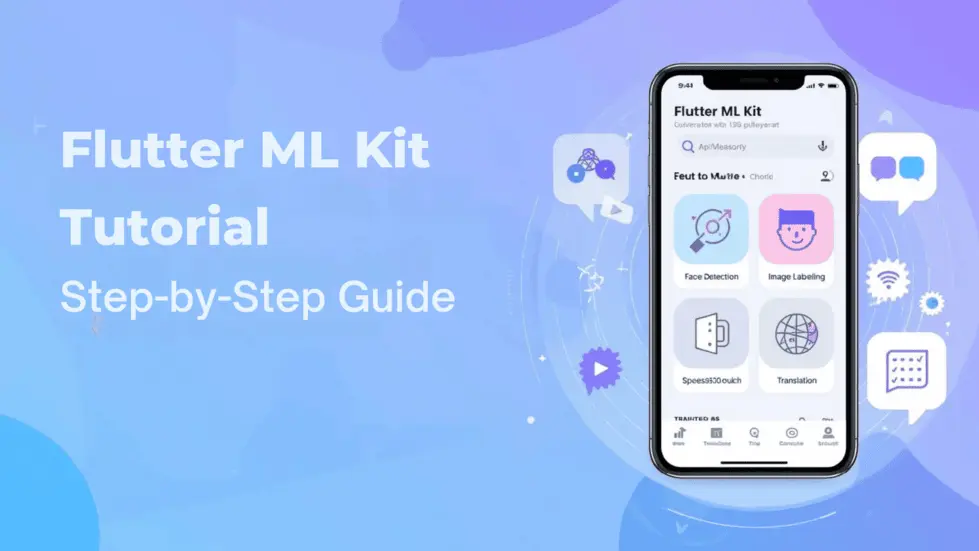
Flutter ML Kit Tutorial for Beginners | 2025 Step-by-Step Guide
Introduction
Welcome! In this tutorial, I will show you how to build a Flutter app using Google ML Kit. You will learn to implement features like text recognition, face detection, image labeling, speech-to-text, text-to-speech, and language translation. This tutorial is perfect if you are a beginner in Flutter and want a hands-on guide.
What you will learn in this tutorial
- How to set up a Flutter project for ML Kit
- How to add necessary dependencies
- How to handle Android and iOS permissions
- How to create services, providers, and screens for each ML feature
- How to connect UI with ML Kit features using Provider state management
Table of Contents
- Prerequisites
- Project Setup
- Create a New Flutter Project
- Add Dependencies
- Configure Android and iOS
- Project Architecture
- Folder Structure
- Provider & State Management Setup
- Feature 1 – OCR (Text Recognition)
- Feature 2 – Face Detection
- Feature 3 – Image Labeling
- Feature 4 – Speech to Text
- Feature 5 – Text to Speech
- Feature 6 – Language Translation
- Running the App
- Optional Improvements & Future Enhancements
- Conclusion
- FAQs
Why Flutter ML Kit is useful
Google ML Kit allows you to add smart features to your Flutter apps without needing deep knowledge of machine learning. Some common features include:
- Text recognition from images
- Face detection in real-time
- Image labeling and object detection
- Speech-to-text and text-to-speech
- Language translation
Who this guide is for
This guide is designed for beginners in Flutter. If you are new to Flutter or mobile development and want to add smart features to your apps step by step, this tutorial is perfect for you.
Step 1: Setting Up the Flutter Project
First, we need to create a Flutter project and prepare it for ML Kit integration.
Creating a new Flutter project
- Open your terminal or command prompt.
- Run the command:
flutter create flutter_ml_kit_app - Navigate to your project folder:
cd flutter_ml_kit_app - Open the project in your preferred editor (VS Code, Android Studio, etc.)
Adding dependencies
Open pubspec.yaml and add the following dependencies:
google_mlkit_text_recognitiongoogle_mlkit_face_detectiongoogle_mlkit_image_labelingspeech_to_textflutter_ttsgoogle_mlkit_translationprovider
Then run flutter pub get to install them.
Configuring Android and iOS permissions
ML Kit features like camera, microphone, and photo library require permissions:
- Android: Add permissions in
AndroidManifest.xml - iOS: Add usage descriptions in
Info.plist
Step 2: Project Structure
For a clean architecture, we will use:
lib/services/– for ML Kit and other service classeslib/providers/– for state management using Providerlib/screens/– for UI screenslib/utils/– for helper classes and constants
Prerequisites
Before we start building our Flutter ML Kit project, there are a few things you need to have ready. These are important so that you can follow the tutorial without issues.
- Flutter SDK installed: You need to have Flutter installed on your computer. Flutter allows you to build apps for both Android and iOS using a single codebase.
- IDE setup (VS Code / Android Studio): An IDE makes it easier to write, run, and debug your Flutter code. You can use VS Code or Android Studio depending on your preference.
- Basic knowledge of Flutter widgets: Understanding how widgets work in Flutter will help you follow this tutorial. You don’t need to be an expert, but you should know how to use StatelessWidget, StatefulWidget, Column, Row, and basic UI components.
If you have these ready, you are all set to start building your first Flutter ML Kit app!
Project Setup
Create a New Flutter Project
First, we need to create a new Flutter project. Open your terminal or command prompt and run the following command:
flutter create flutter_ml_kit_appThis will make a Flutter project named flutter_ml_kit_app with the default folder structure:
- lib/: Contains all Dart files including main.dart, screens, and services.
- android/ and ios/: Platform-specific files and configurations.
- pubspec.yaml: Where you manage project dependencies, assets, and other settings.
Understanding this structure is important because we will add code in the lib folder and configure permissions in the platform folders.
Add Dependencies
Open the pubspec.yaml file and add the required packages. These packages provide the functionality for ML Kit, speech recognition, text-to-speech, and state management.
dependencies:
  flutter:
    sdk: flutter
  provider: ^6.0.5
  google_mlkit_text_recognition: ^0.5.0
  google_mlkit_face_detection: ^0.5.0
  google_mlkit_image_labeling: ^0.5.0
  google_mlkit_translation: ^0.5.0
  speech_to_text: ^5.5.0
  flutter_tts: ^3.5.2
After adding these, run:
flutter pub getThis will install all necessary packages into your project.
Configure Android and iOS
Android Configuration
Open android/app/src/main/AndroidManifest.xml and add the required permissions inside the <manifest> tag (but outside <application>):
<uses-permission android:name="android.permission.CAMERA" />
<uses-permission android:name="android.permission.RECORD_AUDIO" />
<uses-permission android:name="android.permission.READ_EXTERNAL_STORAGE" />
<uses-permission android:name="android.permission.READ_MEDIA_IMAGES" />
iOS Configuration
Open ios/Runner/Info.plist and add the following keys:
<key>NSCameraUsageDescription</key>
<string>This app uses the camera for image recognition, face detection, and OCR.</string>
<key>NSMicrophoneUsageDescription</key>
<string>This app uses the microphone for speech recognition.</string>
<key>NSPhotoLibraryUsageDescription</key>
<string>This app needs access to your photo library to analyze existing images.</string>
Deployment Targets
For iOS, ensure your deployment target is at least 15.5. Open the Podfile and set:
platform :ios, '15.5'Also, make sure IPHONEOS_DEPLOYMENT_TARGET is updated if needed. This ensures compatibility with the latest ML Kit features.
Project Architecture
Folder Structure
To keep the project organized and maintainable, we follow a clean folder structure:
- lib/screens/ – Contains all UI screens like OCR screen, Translation screen, Speech-to-Text screen, and Text-to-Speech screen.
- lib/services/ – Contains all service classes for ML Kit, APIs, speech recognition, and text-to-speech functionality.
- lib/providers/ – Contains provider classes for state management using
ChangeNotifier. - lib/utils/ – Contains helper files such as constants, supported languages, and utility functions.
This structure makes it easy to locate code, add new features, and maintain the project as it grows.
Provider & State Management Setup
We use Provider to manage state in the app. This helps us separate UI from business logic, making the app easier to test and maintain. Beginners can also explore Flutter InheritedWidget & Provider to understand how Flutter state flows and how it differs from using Flutter setstate.
BaseProvider Class
The BaseProvider is a custom class that extends ChangeNotifier. It provides a consistent way to handle UI states like:
- idle – default state
- loading – when an operation is in progress
- success – when an operation completes successfully
- error – when something goes wrong
It also allows showing error messages easily from any provider.
ChangeNotifierProvider Usage
We wrap our screens with ChangeNotifierProvider so that the UI can listen to changes in the provider and update automatically.
ChangeNotifierProvider(
  create: (_) => OcrProvider(),
  child: OcrScreen(),
)
Here, OcrProvider is a provider that handles OCR functionality. Using Provider makes it easy to share data and state across widgets without passing props manually.
Why Provider is Used
We use Provider because it is simple, lightweight, and works well for beginner to intermediate Flutter projects. It allows us to:
- Separate UI from business logic
- Update the UI automatically when data changes
- Keep code organized and scalable
Feature 1 – OCR (Text Recognition)
Service Layer
The OCRService handles all the logic for recognizing text from images using Google ML Kit. It abstracts the ML Kit implementation so that the provider and UI layers don’t need to worry about how the text recognition works.
- Initializes the text recognition engine
- Processes images captured from the camera or gallery
- Returns recognized text to the provider
Example usage:
final recognizedText = await _ocrService.recognizeText(imagePath);Provider Layer
The OCRProvider manages the state for the OCR feature. It extends BaseProvider and uses ChangeNotifier to notify the UI about changes.
- Stores the recognized text
- Manages loading, success, and error states
- Handles image selection from camera or gallery
By keeping the logic in the provider, the UI remains clean and only focuses on displaying data.
UI Layer
The OCRScreen is responsible for showing the user interface:
- Buttons to capture or select an image
- A container to display the recognized text
- Loading indicators while processing the image
The screen listens to the OCRProvider for state changes and updates the UI automatically:
Consumer<OCRProvider>(
  builder: (context, provider, _) {
    return Text(provider.recognizedText);
  },
)
This setup ensures that the UI, provider, and service layers are cleanly separated, making the code easier to maintain and extend.
Feature 2 – Face Detection
Service Layer
The FaceDetectionService handles detecting faces in images or live camera feeds using Google ML Kit. It abstracts the face detection logic, so the provider and UI do not need to manage ML Kit directly.
- Initializes the face detector
- Processes images from camera or gallery
- Returns face coordinates and landmarks to the provider
Example usage:
final faces = await _faceService.detectFaces(imagePath);Provider Layer
The FaceDetectionProvider manages the state for face detection. It extends BaseProvider and uses ChangeNotifier to update the UI.
- Stores the detected faces
- Handles loading, success, and error states
- Manages image input and updates results accordingly
Using the provider ensures that the face detection logic is separated from the UI.
UI Layer
The FaceDetectionScreen is responsible for displaying the results:
- Button to capture or select an image
- Overlay showing detected faces on the image
- Loading indicators while detecting faces
The screen listens to the FaceDetectionProvider and updates automatically:
Consumer<FaceDetectionProvider>(
  builder: (context, provider, _) {
    return Stack(
      children: [
        Image.file(provider.selectedImage),
        ...provider.faces.map((face) => FaceBoundingBox(face)),
      ],
    );
  },
)
This separation of service, provider, and UI layers keeps the code clean and maintainable.
Feature 3 – Image Labeling
Service Layer
The ImageLabelingService handles detecting objects and labels in images using Google ML Kit. It simplifies interaction with ML Kit, providing the labels and confidence scores to the provider.
- Initializes the image labeler
- Processes images from camera or gallery
- Returns a list of labels with confidence values
Example usage:
final labels = await _imageLabelingService.labelImage(imagePath);Provider Layer
The ImageLabelingProvider manages the state for image labeling:
- Keeps track of detected labels
- Handles loading, success, and error states
- Notifies the UI when labels are ready
Using the provider allows the UI to reactively update whenever new labels are detected.
UI Layer
The ImageLabelingScreen displays the results:
- Select or capture an image
- Show a list of detected labels with confidence percentages
- Provide loading indicators while processing
You can learn more about how we display lists efficiently in Flutter using ListView.builder or Flutter Gridview Widget.
Example snippet:
Consumer<ImageLabelingProvider>(
  builder: (context, provider, _) {
    return Column(
      children: [
        Image.file(provider.selectedImage),
        ...provider.labels.map((label) => ListTile(
          title: Text(label.text),
          subtitle: Text('Confidence: ${label.confidence.toStringAsFixed(2)}'),
        )),
      ],
    );
  },
)
This structure keeps service, provider, and UI separated for better maintainability and readability.
Feature 4 – Speech to Text
Service Layer
The SpeechToTextService manages speech recognition:
- Initializes the speech engine
- Starts and stops listening
- Returns recognized words to the provider
This service isolates the speech recognition logic from the UI, making it reusable.
Provider Layer
The SpeechToTextProvider manages the app state:
- Handles microphone permission using PermissionService
- Keeps track of whether the app is listening
- Stores recognized text
- Handles loading, success, and error states
It communicates between the service and UI, notifying the screen when text updates.
UI Layer
The SpeechToTextScreen allows users to interact with speech recognition:
- Animated microphone button to start/stop listening
- Text area to display recognized words
- Error messages for permission or initialization issues
- Buttons to clear transcription or stop listening
Example snippet:
ElevatedButton.icon(
  onPressed: provider.toggleListening,
  icon: Icon(provider.isListening ? Icons.stop : Icons.mic),
  label: Text(provider.isListening ? 'Stop' : 'Start'),
),
This setup ensures smooth real-time speech-to-text functionality with clear state management.
Feature 5 – Text to Speech
Service Layer
The TextToSpeechService handles converting text into spoken words:
- Speaks the given text using Flutter TTS plugin
- Stops or pauses speech
- Gets available languages and sets selected language
This layer isolates text-to-speech logic from the UI.
Provider Layer
The TextToSpeechProvider manages the app state:
- Stores the list of available languages
- Keeps track of the selected language
- Handles loading, success, and error states while speaking
- Communicates between service and UI for language selection and speech control
UI Layer
The TextToSpeechScreen lets users interact with the feature:
- Text field to enter the text to speak
- Dropdown to select the language
- Buttons to Speak, Pause, and Stop
Example snippet:
ElevatedButton.icon(
  onPressed: () => provider.speak(_controller.text),
  icon: const Icon(Icons.play_arrow),
  label: const Text('Speak'),
),
This feature enables clear, controlled text-to-speech functionality for users with language selection support.
Feature 6 – Language Translation
Supported Languages
We use a predefined list of supported languages for translation. Each language has a name and ML Kit code. Examples include:
- English
- Spanish
- French
- German
- Hindi
- Chinese
- Japanese
- Korean
Service Layer
The TranslationService handles translating text using ML Kit:
- Ensures the translation models are downloaded for source and target languages
- Translates input text on-device
- Deletes models if needed
Provider Layer
The TranslationProvider manages state and user input:
- Keeps track of source and target languages
- Stores input text and translated text
- Handles loading, success, and error states during translation
- Provides functions to swap languages and update input
UI Layer
The TranslationScreen allows users to translate text easily:
- Dropdowns to select source and target languages
- Text field to enter text for translation
- Button to start translation
- Shows translated text in a scrollable container
- Displays progress and error messages
Users can download models (first-time only) and perform translations directly on the device.
Running the App
Flutter Commands
After setting up the project and adding all dependencies, run the following commands from your project root:
flutter pub get– to install all dependenciesflutter run– to run the app on a connected device or emulator
Testing on Real Devices
Some features require real devices for proper testing:
- Camera – for OCR, face detection, and image labeling
- Microphone – for speech-to-text functionality
- Translation – model downloads require internet access
Important Tips
- Ensure all permissions are granted on Android and iOS
- Use a device with camera and microphone capabilities for accurate testing
- Check the console for any errors or debug messages during development
Optional Improvements & Future Enhancements
Even though this app is fully functional, there are some optional improvements you can make to enhance the user experience, app reliability, and learning value. These are not required to run the app but can make it better:
- Error Handling Improvements: Add more robust handling for camera, microphone, and file access failures. Show clear messages to users when something goes wrong.
- UI Polish: Improve the interface with animations, better layouts, and consistent themes to make the app look professional and user-friendly.
- Extra ML Kit Features: Explore adding other ML Kit capabilities like barcode scanning, pose detection, or object detection for more advanced use cases.
- Testing & CI Setup: Add unit tests, widget tests, and continuous integration setup to ensure your app works reliably and to learn best practices in Flutter development.
Implementing these improvements is a great way to take this project from beginner-friendly to professional-level while learning more about Flutter and ML Kit.
Conclusion
In this tutorial, you have built a complete Flutter app integrating multiple ML Kit and speech features. Here’s a quick recap:
- OCR (Text Recognition): Recognize text from images using the camera or gallery.
- Face Detection: Detect faces in images and display results in real-time.
- Image Labeling: Identify objects and display labels with confidence scores.
- Speech to Text: Convert spoken words to text with microphone input.
- Text to Speech: Speak out text with selectable languages and pause/stop controls.
- Language Translation: Translate text between supported languages using on-device models.
You can extend this app by:
- Adding more ML Kit features like barcode scanning or pose detection.
- Improving UI with animations and better user feedback.
- Saving recognized or translated text for future use.
- Integrating with cloud APIs for additional AI capabilities.
As a beginner, this project helps you understand how to structure a Flutter app, manage state using providers, and connect UI with real-time ML features. Keep experimenting, and you will gain confidence building more advanced apps!
FAQs
1. Do I need a real device to test these features?
Yes. Features like camera access, microphone input, and real-time translations work best on real devices. Emulators may not fully support all functionalities.
2. Can I use this app without internet?
Most features like OCR, face detection, image labeling, and on-device translation work offline. However, downloading translation models initially requires an internet connection.
3. Do I need prior ML experience?
No. This tutorial is beginner-friendly. You only need basic Flutter knowledge. The ML Kit services handle the complex processing for you.
4. Can I add more languages for translation?
Yes. Google ML Kit supports many languages. You can update the supported languages list and download the required models.
5. How do I extend this app with more ML features?
Follow the same structure: create a service for the feature, a provider for state management, and a screen for UI. You can reuse the base provider and UI patterns.